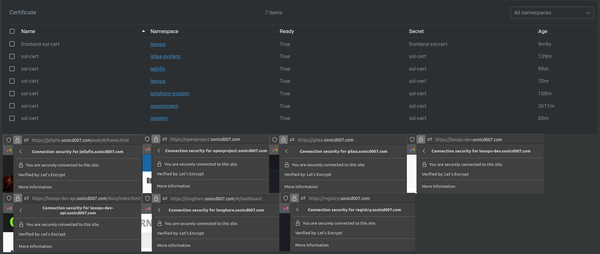
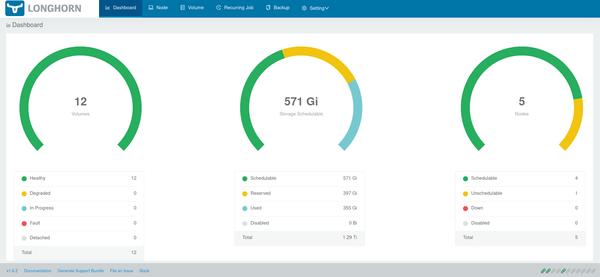
Self Learning Kubernetes: SSL setup and DNS resolution (Pt. 4)
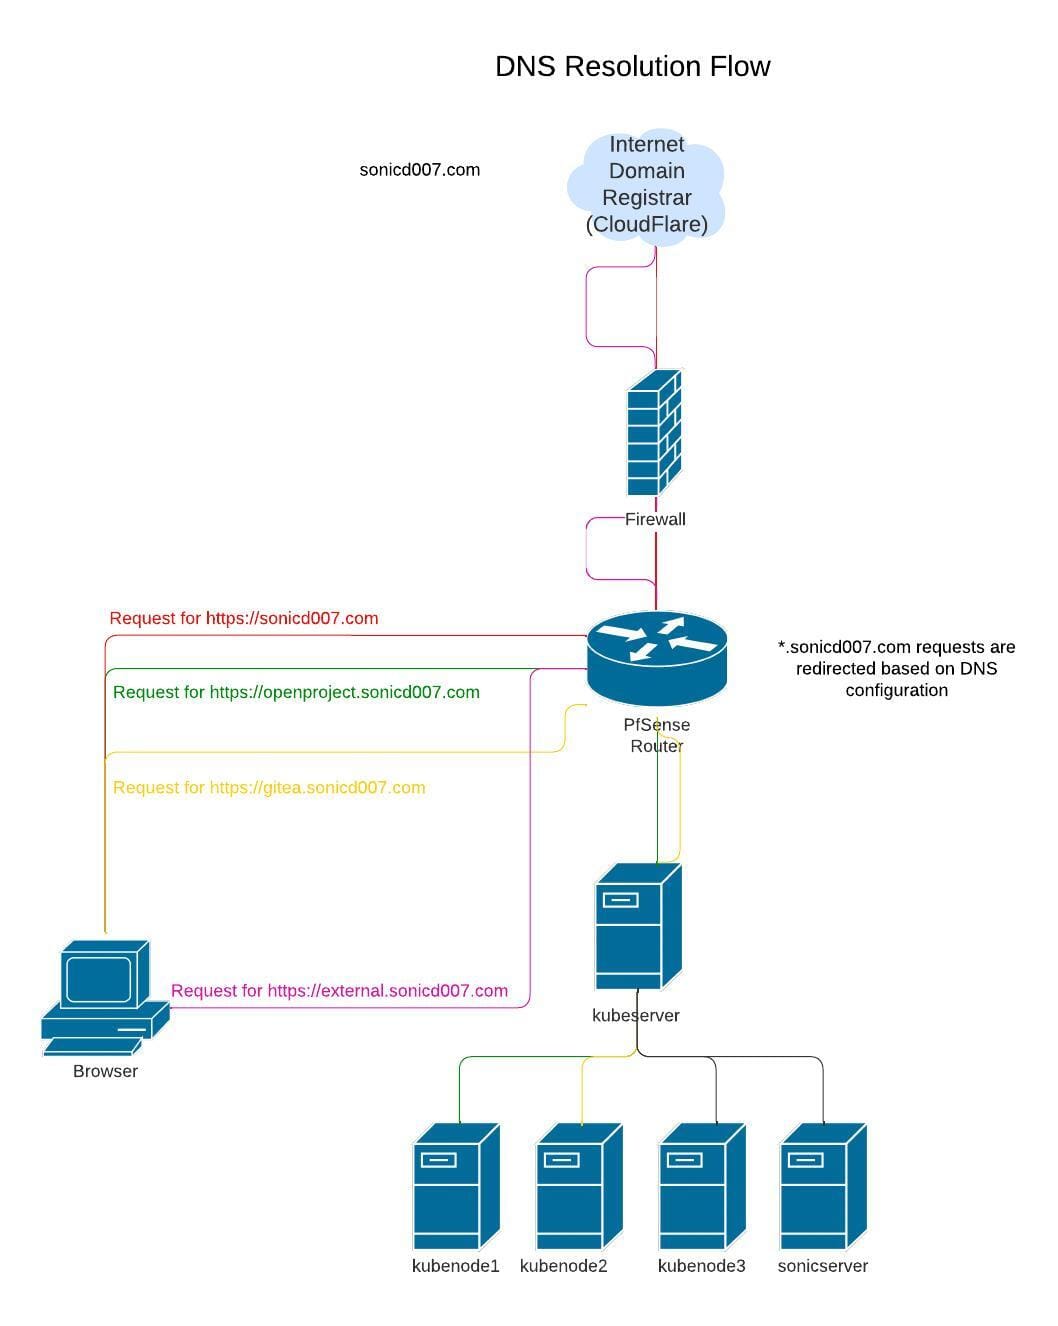
TLDR: Purchase a domain, use LetsEncrypt to generate a wildcard cert for subdomains, modify DNS to point to local servers, use SSL cert within Kubernetes deployments
Introduction
There are a lot of reasons why you might want to setup SSL certificates on your LAN. The most prominent being that you want to encrypt HTTP traffic to ensure users on your LAN aren't able to sniff out your login credentials on your webpage. Another reason is to get rid of the annoying "This website is not secure!" message that scares non-technical users from viewing your web page. My reason for wanting to setup SSL was so that I could test my websites with SSL enabled, use third party login providers such as auth0, and I wanted to simulate production as much as possible within my home lab. So without further ado, let's dive into how I setup my SSL certificates for my Kubernetes cluster as well as how I modified my DNS configuration to meet my goals.
Purchase a domain
If you don't already have a public domain you're going to want to go ahead and get one from your hosting provider or domain registrar service. I personally started off using Namecheap as my domain name provider but recently switched over to Cloudflare due to Namecheap not supporting LetsEncrypt automated certificate renewals. Domain names are relatively cheap and the provider you use is personal preference.
Setup LetsEncrypt
Next, you'll need to generate your SSL certificates. I use LetsEncrypt because it's free to generate your SSL cert and has automated renewal as well as a handy dandy certbot tool that will help you manage your SSL cert. This is the important step as you'll want to create a wildcard SSL cert if you want to all subdomains to your website to be protected via SSL. LetsEncrypt is a Certificate Authority which is why it's able to generate trusted certificates. I won't get into details about Certificate Authorities or chain of trust but I figured I'd mention it in case you'd like to dig deeper into these topics.
For my homelab this works perfectly for me but in a production environment you may want to have separate domains for each website that way you aren't relying on the same SSL cert for every website. The only reason for this in my eyes would be if for whatever reason SSL communication was cracked then all your websites wouldn't share the same certificate. Similar to how you shouldn't reuse passwords across websites.
Visit https://certbot.eff.org/ in order to determine if you need certbot. Additionally, it will provide you commands to help you get running quickly.
Since I cannot use certbot's automated generation/retrieval with Namecheap, I had to do it manually. To do this, I ran the following command on kubeserver:
sudo certbot certonly --manual --preferred-challenges dns -d '*.sonicd007.com' -d 'sonicd007.com'
This command gave me some _acme-challenge DNS TXT records that I needed to add to my Domain Name via Namecheap. I logged in to my account, and under "Advanced DNS" settings, I added two new TXT records and waited for the updates to propagate. I used https://toolbox.googleapps.com/apps/dig/#TXT/_acme-challenge.sonicd007.com and https://www.whatsmydns.net/#TXT/_acme-challenge.sonicd007.com to verify when the propagation was complete.
I've since changed DNS providers to Cloudflare so I'll backtrack to this to setup automated certificate renewal in the future.
Kubernetes Secret setup for SSL
Once verified, I continued within certbot's CLI which generated the fullchain.pem and privkey.pem files. These are the SSL certificates I used in my "ssl-cert" Kubernetes secret manager which OpenProject would use. This is how the secret was created:
kubectl -n openproject create secret tls ssl-cert --key="privkey.pem" --cert="fullchain.pem"
Setting up TLS using a helm chart
Setting up TLS using Helm is extremely easy. Simply specify the tls setting on the ingress spec like so:
  host: "openproject.sonicd007.com"
ingress:
  host: "openproject.sonicd007.com"
  tls:
    ## The name of the kubernetes secret which contains a TLS private key and certificate.
    ## Hint: This secret is not created by this chart and must be provided.
    ##
    #
    enabled: true
    secretName: "ssl-cert"
In this example, I was setting up OpenProject on my Kubernetes cluster which is a great alternative to Atlassian Jira.

This makes it so that when I visit https://openproject.sonicd007.com I will be redirected to the kubeserver node which knows that any request made on that domain name should be routed to the OpenProject service.
Great so now I have the SSL certificate situation sorted out...mostly. The next step is to modify the DNS rules on my router to point https://openproject.sonicd007.com to my Kubernetes cluster.
Configuring DNS server to re-route traffic as appropriate
Modifying your network DNS server to route traffic is dependent on the DNS server you're using. Since this varies across devices I'll explain from a high level what you're trying to do here. For reference, I use a router with PfSense installed on it.
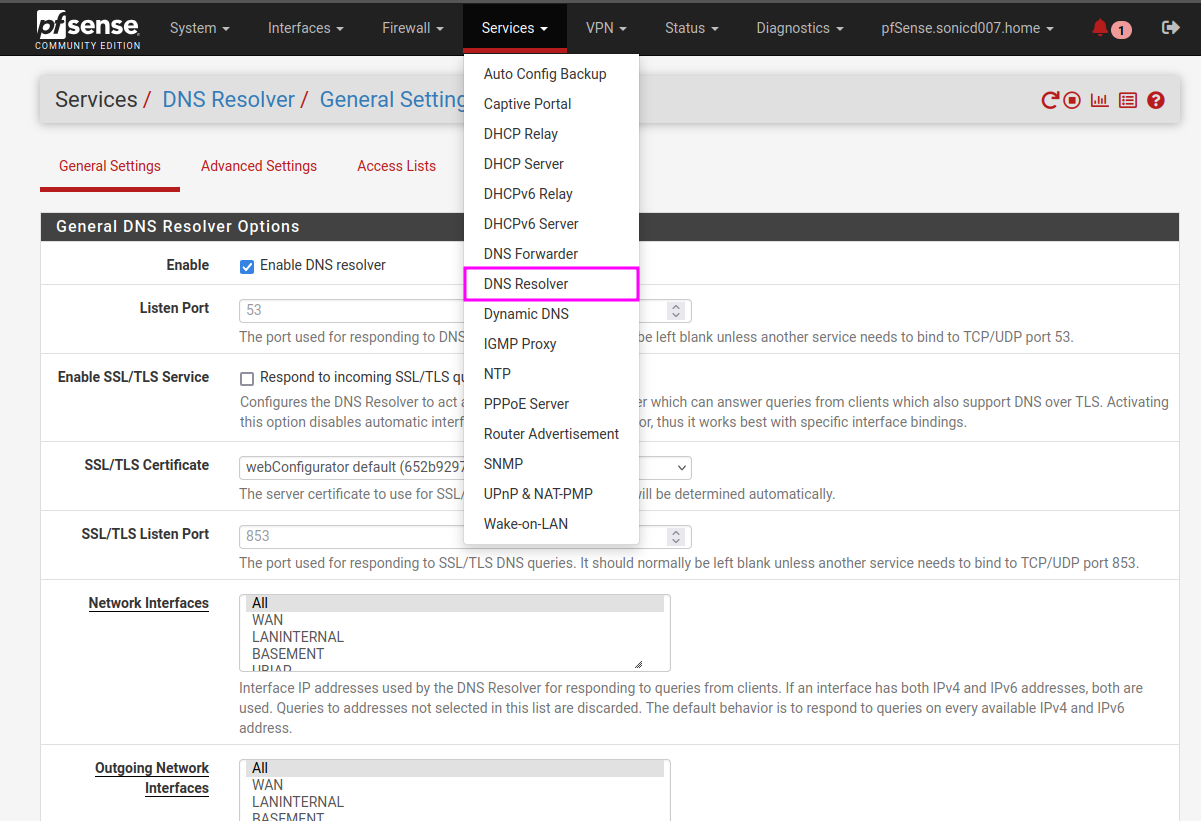
Within the DNS Resolver, you'll want to add your subdomains with the appropriate machine those names should resolve to. In my case I'm forwarding all the traffic for *.sonicd007.com to my Kubernetes cluster. Any subdomains not listed here will continue out of the LAN network and out to the internet DNS resolvers.
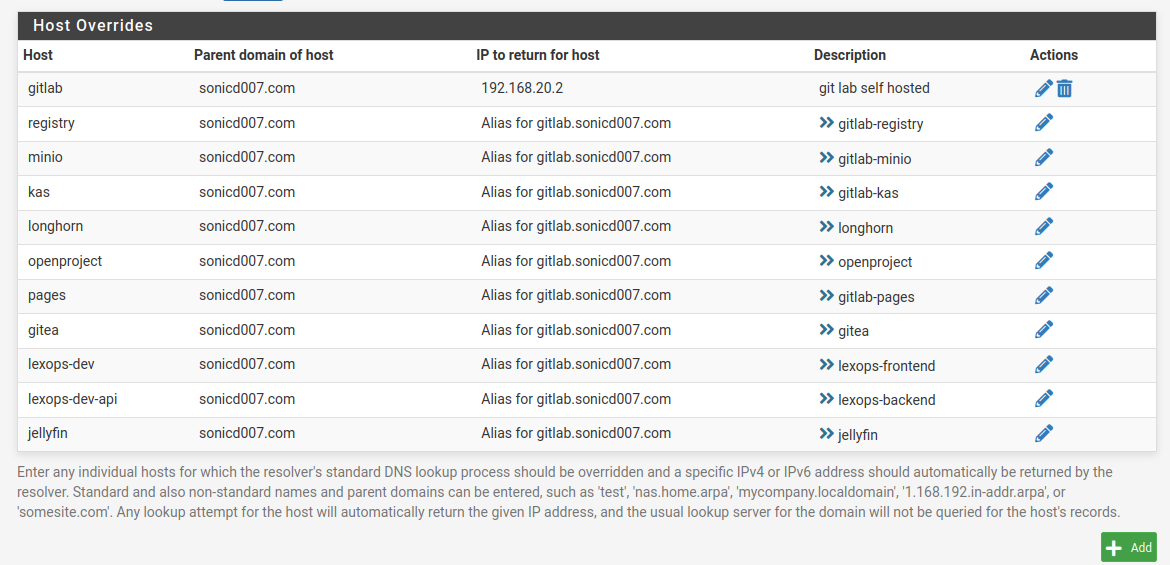
Ensure your ip mapping is static so the machine's IP address doesn't change and you should be good to go (assuming your LAN machines are on the same subnet and firewall rules allow the communication). This is done within your DHCP software and instructions on how to do this varies on the DHCP service you're using. For PfSense, you can navigate to DHCP Server under the "Services" section. This is what my Kubernetes cluster static IP mappings look like:

Testing it out
Everything should now be in place. Attempting to access https://openproject.sonicd007.com now displays OpenProject with SSL enabled! The benefit of this setup is that I can also allow others to access this OpenProject instance by setting up OpenVPN and allowing users to the subnet this instance is on. This allows a secure internal tooling setup that's also accessible from outside the network via OpenVPN. I won't cover the OpenVPN setup in this post but know that this setup works well should you need to access your Kubernetes resources from an insecure network.

Conclusion
There were a lot of steps in getting SSL working with setup but you should never have to worry about messing with this again once it's in place. With this you have the flexibility of working on SSL protected websites within your network, ability to use third party authentication providers that require HTTPS communication, and other users on your network won't be able to sniff out credentials on your development or internally hosted tools. Hopefully you also have a better understanding as to how these different services work and how they tie together. I hope this helps you set your own home lab!
